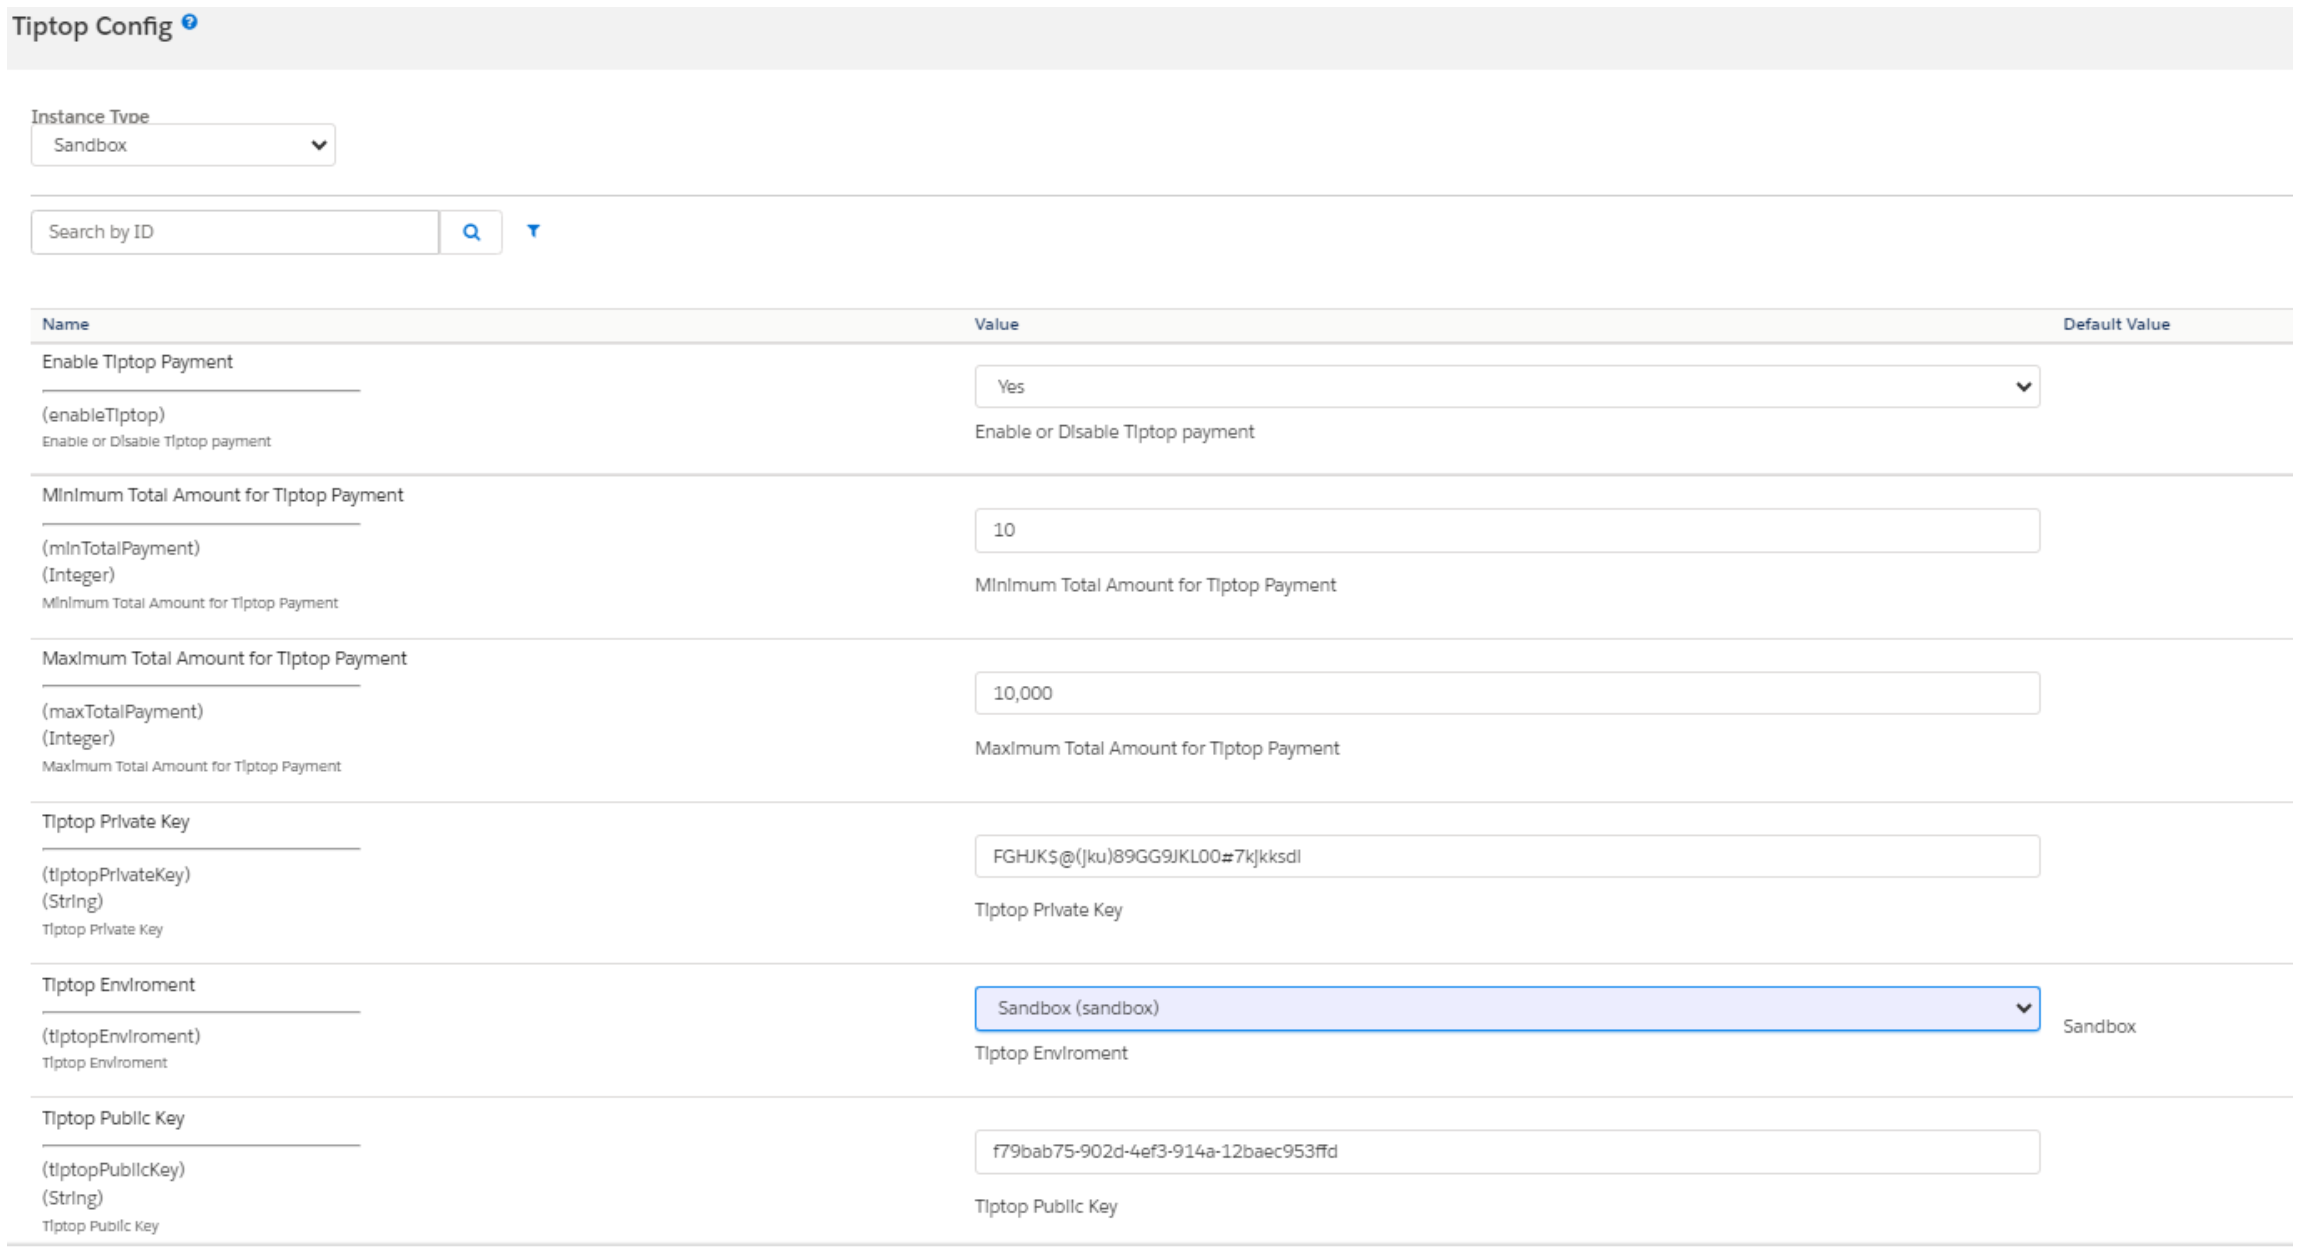
Configurations
This section describes the configuration of the sandbox.
- Go to Merchant Tools > Site Preferences > Custom Preferences > Tiptop
- Enable attribute - Tiptop Online Status. This attribute defines the status (enable/disable) of the Tiptop integration.
- Select a value from the dropdown Tiptop Mode. This attribute defines in which mode the cartridge will work. Allowable values are “Sandbox” and “Production”.
- Add site preference attribute - Tiptop Public Key with provided public key from Tiptop.
- Add site preference attribute - Tiptop Private Key with provided private key from Tiptop.
- Select a value from the Tiptop Payment Action dropdown. This attribute defines which Tiptop payment actions will be used in the checkout process.
- Enable attribute - Cart Promo Message. This attribute defines status (enable/disable) of Promotional messages on Cart Page. – In review
- Enable attribute - Product Promo Message. This attribute defines status (enable/disable) of Promotional messages on Product Detail Page. – In review
- Enable attribute - PLP Promo Message. This attribute defines status (enable/disable) of Promotional messages on Product Listing Page. – In review
- Add site preference value attribute - Default financing program. This attribute defines which financing program will be used by default (if any other financing programs have not been applied).

- Add site preference value - Tiptop Min Total. It allows setting a minimal price value for displaying promotional messages. Products with a price lower than this value will not have a promotional message.
- Add site preference attribute - Min Total with minimal cart total when Tiptop payment method is available.
- Add site preference attribute - Max Total with maximal cart total when Tiptop payment method is available.